详细记录编译OpenWrt的过程,避免之后需要使用时失忆。
源的选择
目前有两个选择Lienol 源和Lean源。附上项目地址
https://github.com/Lienol/openwrt
https://github.com/coolsnowwolf/lede
我这里主要使用lean大的源。
编译命令
首次编译
以下过程来自lean大源的仓库
首先装好 Ubuntu 64bit,推荐 Ubuntu 18 LTS x64
命令行输入
sudo apt-get update,然后输入sudo apt-get -y install build-essential asciidoc binutils bzip2 gawk gettext git libncurses5-dev libz-dev patch python3 python2.7 unzip zlib1g-dev lib32gcc1 libc6-dev-i386 subversion flex uglifyjs git-core gcc-multilib p7zip p7zip-full msmtp libssl-dev texinfo libglib2.0-dev xmlto qemu-utils upx libelf-dev autoconf automake libtool autopoint device-tree-compiler g++-multilib antlr3 gperf wget curl swig rsync使用
git clone https://github.com/coolsnowwolf/lede命令下载好源代码,然后cd lede进入目录./scripts/feeds update -a ./scripts/feeds install -a make menuconfigmake -j8 download V=s下载dl库(国内请尽量全局科学上网)输入
make -j1 V=s(-j1 后面是线程数。第一次编译推荐用单线程)即可开始编译你要的固件了。
make menuconfig
首先是选择目标系统。前三项,第一个是系统,第二个是子系统,第三个是目标格式。这里选择默认的x86
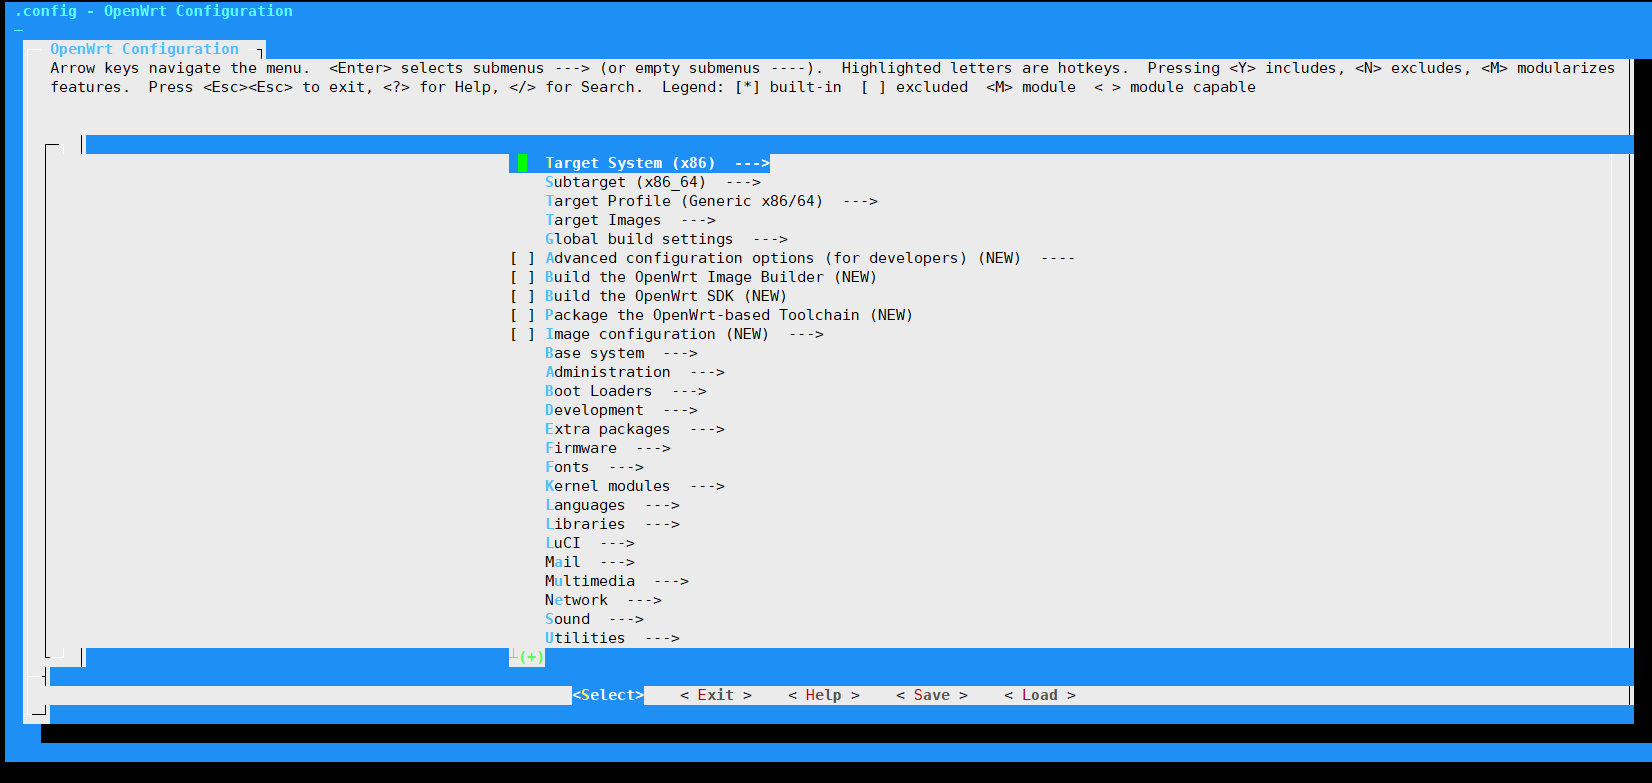
然后进入LuCI菜单,选择需要的软件。
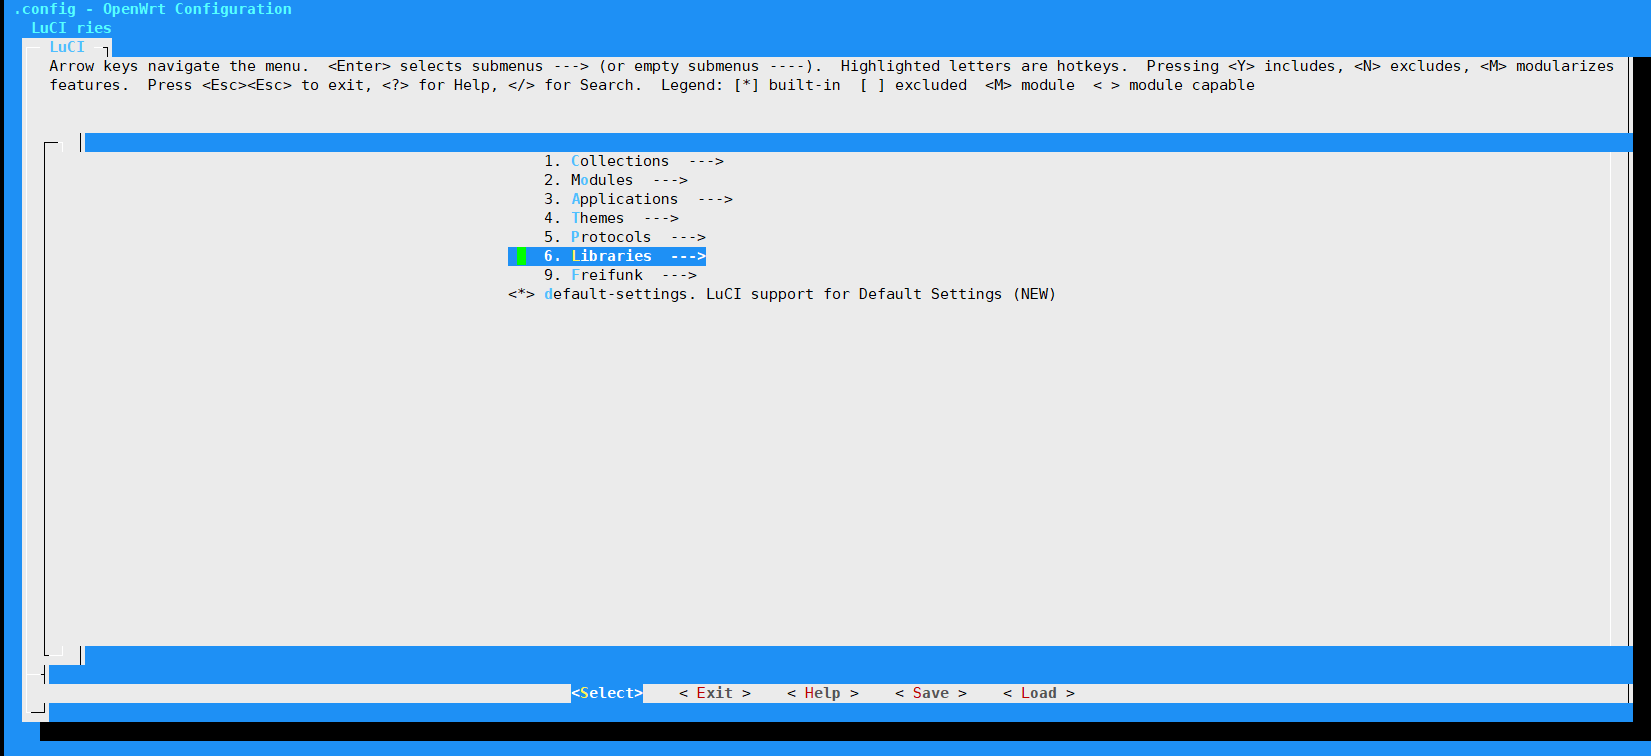
点击 Libraries进入,选择需要的包。
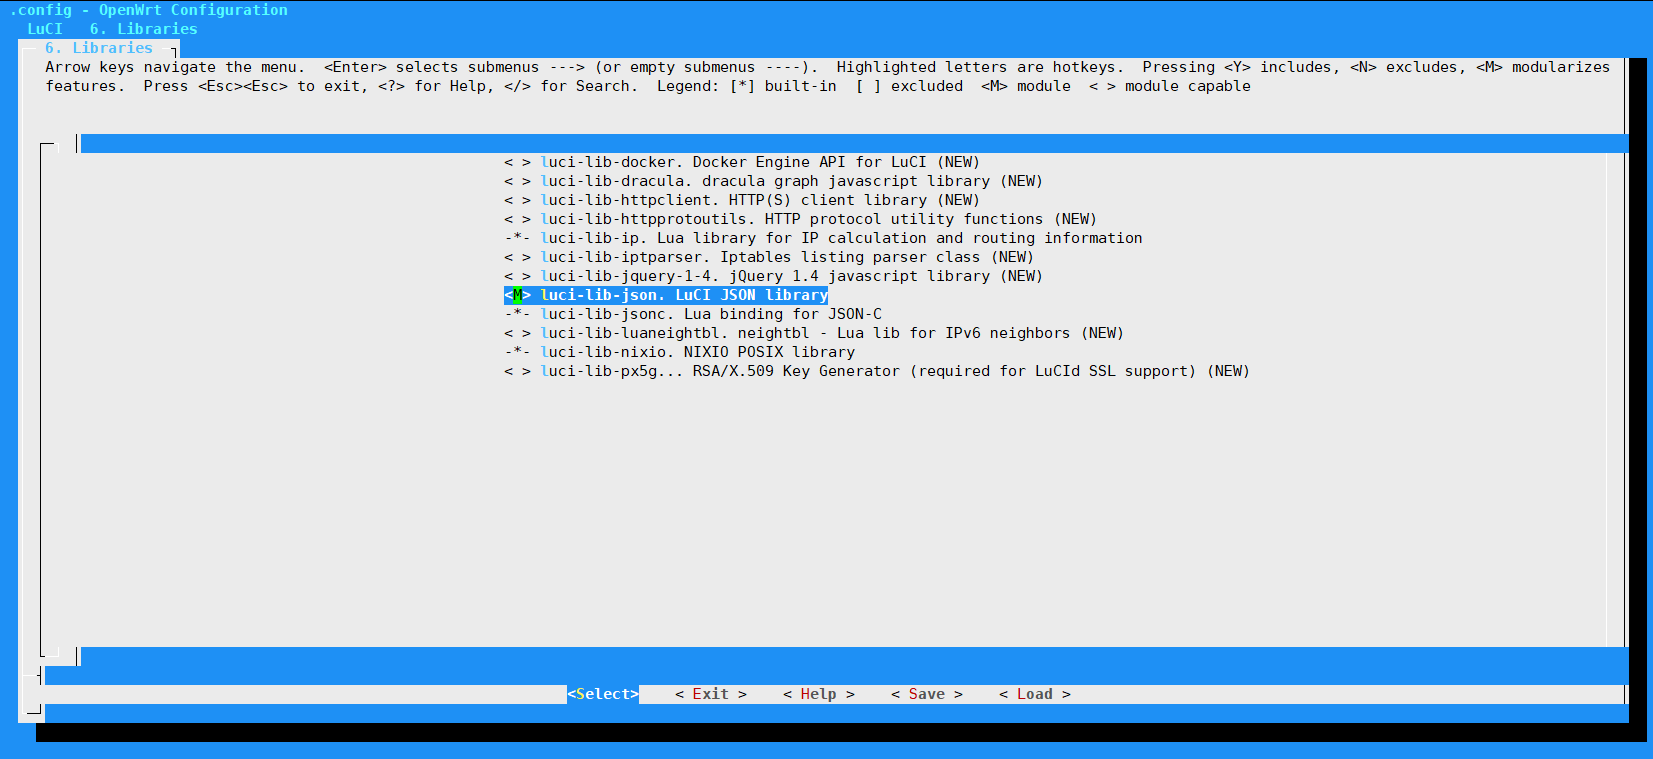
其中M是表示编译且安装,*表示只安装,不会保留编译的apk文件。
因为这里没有去导入其他的依赖,所以显示的内容较少,至于哪些包是需要的可以根据下面恩山帖子自己选择。插件说明:
不能全局科学上网
可以使用ProxyChains4 对命令行的命令进行代理。
安装
先安装好gcc等编译工具
git clone https://github.com/rofl0r/proxychains-ng.git
cd proxychains-ng
./configure --prefix=/usr --sysconfdir=/etc
make
sudo make install
sudo make install-config (installs proxychains.conf)
配置
sudo vi /etc/proxychains.conf
[ProxyList]
socks5 127.0.0.1 1080
使用
proxychains4 ping www.google.com
proxychains4 telnet somehot.com
其他依赖
因为作者屏蔽了科学上网的软件,所以需要引入第三方的包。
cd lede/package
git clone https://github.com/kenzok8/openwrt-packages.git
git clone https://github.com/kenzok8/small.git
然后执行
./scripts/feeds update -a
./scripts/feeds install -a
make menuconfig就会发现你需要的东西都有了。
github编译
利用github action在云端直接编译,感谢微软提供了这么便利的工具给我们。
具体实现下面的帖子讲的非常清楚了:
https://p3terx.com/archives/build-openwrt-with-github-actions.html